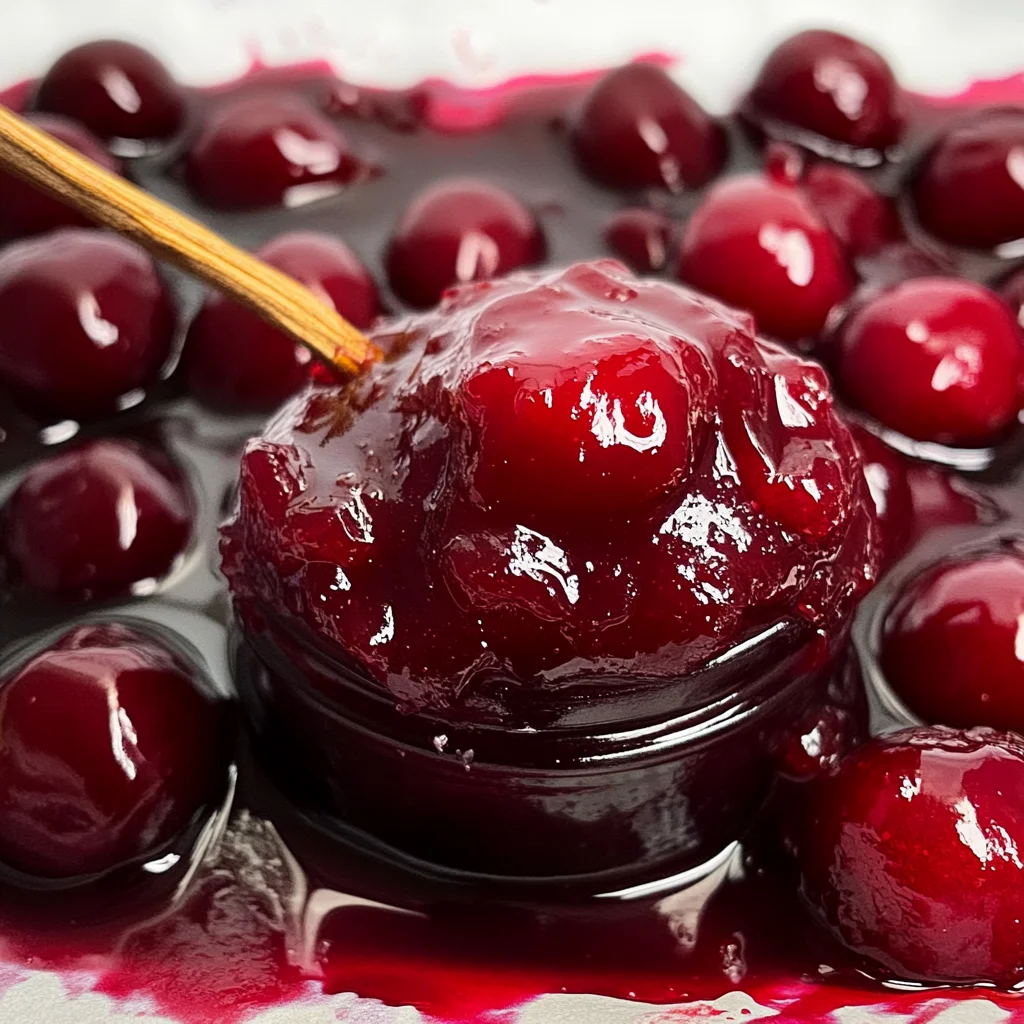
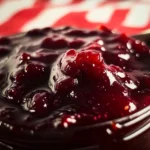
Cherry Vanilla Jam
Sweet, homemade Cherry Vanilla Jam is a delightful treat that combines the rich flavors of dark cherries with the warm essence of vanilla. Perfect for spreading on toast, topping desserts, or gifting to loved ones, this jam stands out with its vibrant color and luscious texture. With simple ingredients and easy steps, you can create a batch that’s ideal for any occasion.
Why You’ll Love This Recipe
- Easy to Make: This jam requires just a few simple ingredients and minimal cooking time.
- Versatile Use: Spread it on your morning toast, swirl it into yogurt, or use it as a topping for ice cream.
- Gifts from the Heart: Homemade jam makes a thoughtful gift for friends and family during holidays or special events.
- Natural Ingredients: Made without artificial preservatives, this jam is a wholesome choice for your pantry.
- Long Shelf Life: Easily canned or frozen, ensuring you can enjoy it throughout the year.
Tools and Preparation
Before diving into the delicious process of making Cherry Vanilla Jam, gather your essential tools. Having everything ready will make your cooking experience smooth and enjoyable.
Essential Tools and Equipment
- Canning jars
- Large pot
- Wooden spoon
- Measuring cups
- Ladle
Importance of Each Tool
- Canning jars: Essential for storing your jam safely and keeping it fresh for longer periods.
- Large pot: Allows even heat distribution while cooking down the cherries without spilling.
- Wooden spoon: Ideal for stirring gently without scratching your pot’s surface.
Ingredients
To make delicious Cherry Vanilla Jam, you’ll need the following ingredients:
For the Jam
- 5 Cups Sweet, dark cherries (about 2.5 lbs)
- 2 1/2 cups white sugar
- 3 Tbs lemon juice
- 1 vanilla bean, split and seeds scraped (or 3 tsp extract)
- 1 packet low-sugar pectin (49 g, or a shallow 1/3 cup)
How to Make Cherry Vanilla Jam
Step 1: Prepare Your Cherries
Begin by washing your sweet dark cherries thoroughly. Remove the pits and chop them into smaller pieces if desired. This helps to release their juices during cooking.
Step 2: Combine Ingredients
In a large pot, combine the prepared cherries with white sugar, lemon juice, and vanilla bean seeds (or extract). Stir well to ensure that all ingredients are mixed evenly.
Step 3: Cook the Mixture
Place the pot on medium heat. Stir occasionally until the mixture begins to boil. Once boiling, continue to cook for about 25 minutes. You’ll notice it thickening as it cooks.
Step 4: Add Pectin
After cooking down the fruit mixture, add the low-sugar pectin to the pot. Stir continuously for about 5 minutes until fully dissolved.
Step 5: Jar Your Jam
Remove from heat and carefully ladle the hot jam into clean canning jars. Leave about 1/4 inch of space at the top before sealing them with lids.
Step 6: Process Your Jars
If you’re canning your jam for long-term storage, process in a boiling water bath according to your canning guidelines. Alternatively, let cool before freezing any portion you won’t use immediately.
Now you’re ready to enjoy your homemade Cherry Vanilla Jam!
How to Serve Cherry Vanilla Jam
Cherry vanilla jam is a versatile condiment that enhances many dishes. Its sweet and rich flavor pairs well with both breakfast and dessert options, making it a delightful addition to your kitchen.
On Toast or Bread
- Spread a generous layer of cherry vanilla jam on warm toast for a sweet breakfast treat.
With Cheese
- Pair the jam with creamy brie or tangy goat cheese on a cheese board for an impressive appetizer.
As a Dessert Topping
- Drizzle over vanilla ice cream or yogurt for a delicious dessert that adds fruity sweetness.
In Baking
- Use cherry vanilla jam as a filling for pastries or thumbprint cookies for an extra burst of flavor.
With Pancakes or Waffles
- Serve alongside pancakes or waffles as a sweet syrup alternative that elevates your brunch experience.
In Smoothies
- Blend into your morning smoothie for added flavor and natural sweetness without refined sugars.
How to Perfect Cherry Vanilla Jam
Making perfect cherry vanilla jam is all about timing and technique. Here are some tips to ensure your jam turns out just right:
- Choose ripe cherries: Select dark, sweet cherries at their peak ripeness for the best flavor.
- Measure accurately: Use precise measurements of sugar and pectin to achieve the desired consistency.
- Cook carefully: Monitor the cooking time closely to avoid burning and to ensure proper thickening.
- Test for doneness: Use the cold plate method to check if your jam has reached the right set before canning.
- Store properly: If canning, ensure jars are sterilized and sealed correctly to prevent spoilage.
Best Side Dishes for Cherry Vanilla Jam
Cherry vanilla jam can elevate many side dishes, adding sweetness and complexity. Consider these delightful pairings:
-
Cheese Platter
Create an assortment of cheeses accompanied by cherry vanilla jam for a sophisticated snack. -
Roasted Vegetables
Toss roasted carrots or sweet potatoes with a spoonful of cherry vanilla jam for a unique glaze. -
Grilled Chicken Salad
Drizzle over grilled chicken salad to add a sweet contrast to savory greens. -
Savory Scones
Serve fluffy scones with butter and cherry vanilla jam for an unexpected breakfast treat. -
Stuffed Peppers
Mix into rice stuffing for stuffed peppers, enhancing the dish with fruity sweetness. -
Pork Tenderloin (or Chicken)
Brush on grilled pork tenderloin or chicken breasts during cooking for added flavor depth.
Common Mistakes to Avoid
When making Cherry Vanilla Jam, it’s essential to avoid common pitfalls that can affect the taste and texture.
- Skipping the pectin: Not using pectin can lead to a runny jam. Always include it for the right consistency.
- Ignoring fruit preparation: Failing to wash and pit the cherries properly can result in an undesirable texture. Always clean your fruit thoroughly.
- Overcooking the mixture: Cooking too long can caramelize the sugar, changing the flavor. Keep an eye on your jam as it cooks.
- Not measuring ingredients accurately: Inaccurate measurements can lead to failed results. Use a kitchen scale for precise quantities.
- Neglecting sterilization: Using unsterilized jars can spoil your jam. Always sterilize jars and lids before filling them.
Storage & Reheating Instructions
Refrigerator Storage
- Store in airtight containers to maintain freshness.
- Cherry Vanilla Jam lasts about 2-3 weeks in the refrigerator.
- Label containers with date for easy tracking.
Freezing Cherry Vanilla Jam
- Use freezer-safe containers or heavy-duty freezer bags.
- It can be frozen for up to one year without losing flavor.
- Leave some space at the top of containers, as jam expands when frozen.
Reheating Cherry Vanilla Jam
- Oven: Preheat oven to 350°F (175°C) and place jam in a safe dish until warmed through.
- Microwave: Heat in short bursts of 15-20 seconds, stirring in between until desired warmth is reached.
- Stovetop: Gently warm over low heat, stirring occasionally to prevent burning.
Frequently Asked Questions
Here are answers to some common questions about Cherry Vanilla Jam.
How long does Cherry Vanilla Jam last?
Homemade Cherry Vanilla Jam typically lasts 2-3 weeks in the refrigerator and up to a year if frozen properly.
Can I use frozen cherries for this recipe?
Yes, you can use frozen cherries! Just thaw them before cooking for best results.
What can I use instead of vanilla bean?
You can substitute vanilla extract; use about 3 teaspoons for every vanilla bean required.
How do I adjust sweetness in Cherry Vanilla Jam?
To adjust sweetness, simply reduce the amount of sugar used or opt for low-sugar pectin options.
Can I add other fruits to my Cherry Vanilla Jam?
Absolutely! Feel free to mix in other fruits like raspberries or strawberries for unique flavors.
Final Thoughts
Cherry Vanilla Jam is a delightful treat that combines sweet cherries with rich vanilla flavor. This versatile recipe is perfect for spreading on toast or topping desserts. You can customize it by adding other fruits or adjusting sweetness levels. Give it a try and enjoy a homemade delight!
Cherry Vanilla Jam
Indulge in the delightful taste of homemade Cherry Vanilla Jam, where the sweet, rich flavors of dark cherries harmonize beautifully with the warm essence of vanilla. This vibrant jam is perfect for spreading on toast, drizzling over desserts, or gifting to loved ones. With just a handful of simple, wholesome ingredients and a straightforward process, you can create this luscious spread that adds a touch of sweetness to any meal. Whether you’re enjoying it on breakfast or incorporating it into your favorite desserts, this cherry vanilla delight is sure to please!
- Prep Time: 15 minutes
- Cook Time: 30 minutes
- Total Time: 45 minutes
- Yield: Approximately 24 servings (1 tablespoon each) 1x
- Category: Dessert
- Method: Canning
- Cuisine: American
Ingredients
- 5 cups sweet dark cherries (about 2.5 lbs)
- 2 1/2 cups white sugar
- 3 tablespoons lemon juice
- 1 vanilla bean (or 3 teaspoons vanilla extract)
- 1 packet low-sugar pectin
Instructions
- Wash and pit the cherries, chopping them if desired.
- In a large pot, combine cherries, sugar, lemon juice, and vanilla seeds/extract; mix well.
- Heat over medium until boiling; cook for about 25 minutes while stirring occasionally.
- Stir in the pectin and continue cooking for an additional 5 minutes until dissolved.
- Ladle hot jam into sterilized canning jars, leaving 1/4 inch space at the top.
- Process in a boiling water bath if storing long-term or cool before freezing.
Nutrition
- Serving Size: 1 tablespoon (20g)
- Calories: 50
- Sugar: 12g
- Sodium: 0mg
- Fat: 0g
- Saturated Fat: 0g
- Unsaturated Fat: 0g
- Trans Fat: 0g
- Carbohydrates: 13g
- Fiber: 0g
- Protein: 0g
- Cholesterol: 0mg