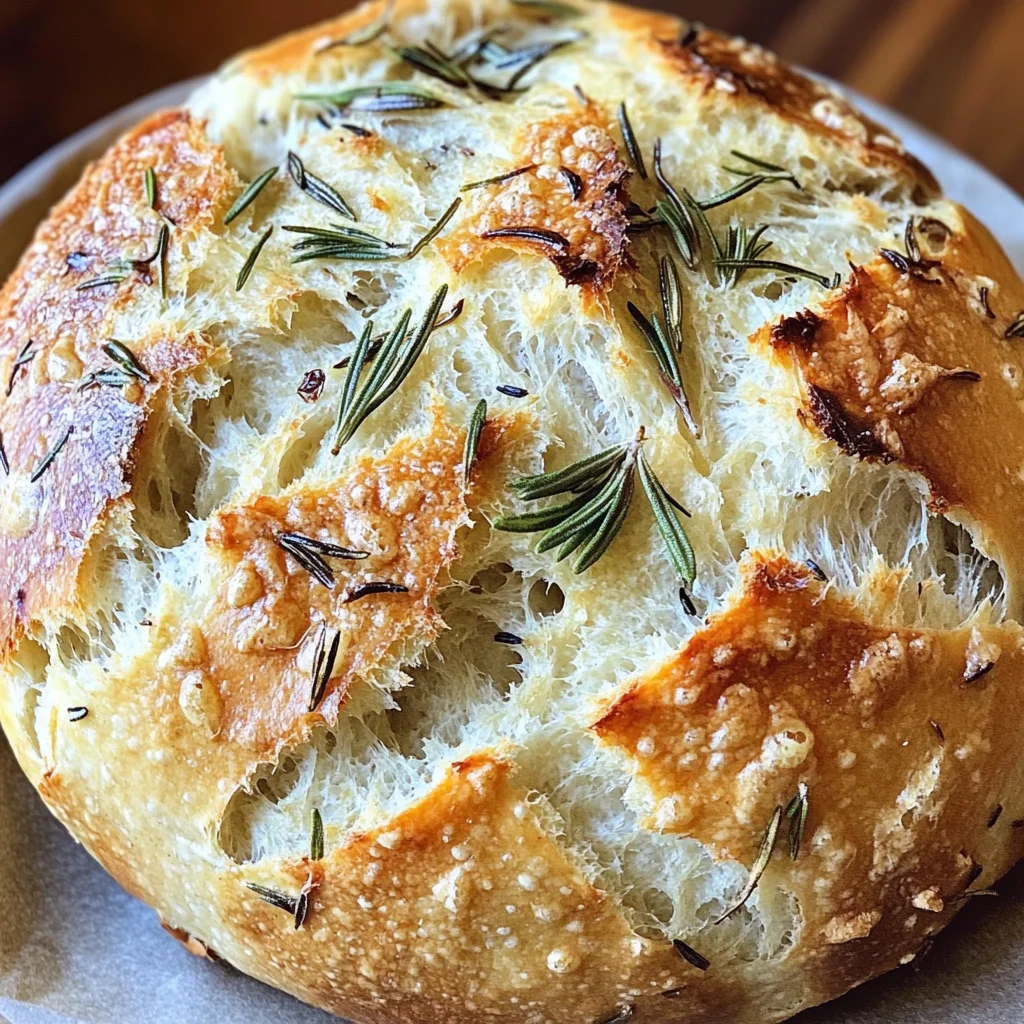
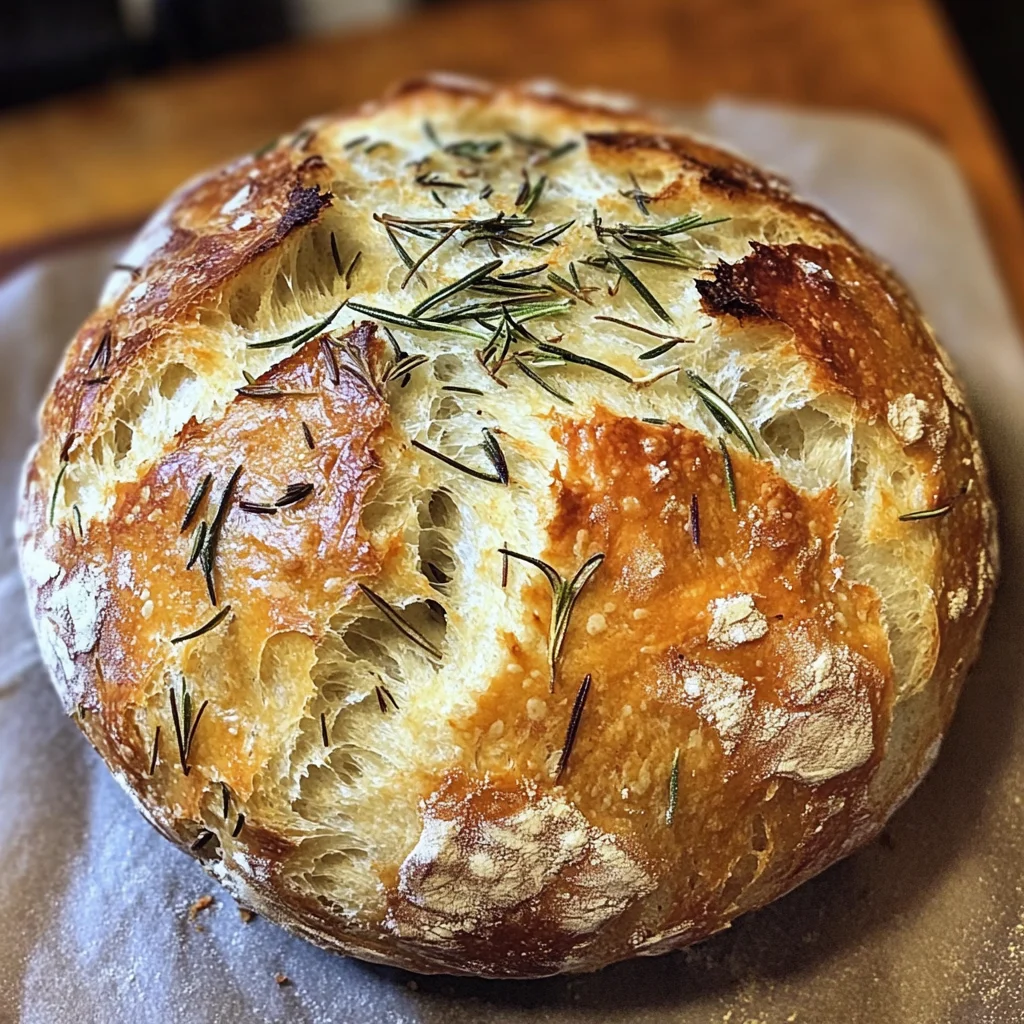
Rosemary and Roasted Garlic Artisan Bread
Crusty, chewy, herby, and wonderfully fragrant, this simple no-knead Rosemary and Roasted Garlic Artisan Bread is everything a good savory loaf should be! Perfect for family dinners, gatherings, or just a cozy night in, this bread brings warmth and flavor to any occasion. Its unique combination of roasted garlic and rosemary creates an irresistible aroma that will fill your kitchen with delight.
Why You’ll Love This Recipe
- Easy to Make: No kneading required! Just mix the ingredients and let time do the work.
- Flavorful Experience: The combination of roasted garlic and fresh rosemary delivers an explosion of flavor in every bite.
- Versatile Use: Great for sandwiches, as a side for soups, or simply enjoyed with butter.
- Impressive Presentation: This artisan bread looks beautiful on any table, making it perfect for entertaining.
- Customizable: Feel free to add other herbs or spices to make it your own!
Tools and Preparation
To create this delightful artisan bread, you’ll need a few essential tools. These will help ensure your baking experience goes smoothly.
Essential Tools and Equipment
- Dutch oven
- Mixing bowls
- Rubber spatula
- Parchment paper
- Kitchen scale (optional)
Importance of Each Tool
- Dutch oven: Traps moisture while baking, creating that crusty exterior that artisan bread is known for.
- Mixing bowls: Provide ample space for combining ingredients without making a mess.
- Rubber spatula: Helps in mixing and scraping down the sides of the bowl efficiently.
Ingredients
For the Garlic
- 1 head garlic
- Extra-virgin olive oil
- Coarse sea salt and freshly ground black pepper
For the Dough
- 1½ cups water, room temperature (at or near 70°F/21°C)
- 1 teaspoon active dry yeast
- 3 cups bread or all-purpose flour, plus more for dusting
- ½ teaspoon dried oregano
- 1 teaspoon kosher or fine sea salt
- 2 teaspoons finely chopped rosemary (plus more to sprinkle across the top)
- 1 whole head roasted garlic (smashed)
- 1 tablespoon extra-virgin olive oil
How to Make Rosemary and Roasted Garlic Artisan Bread
Step 1: Roast the Garlic
- Slice the garlic head in half.
- Drizzle the exposed cloves with olive oil, then season with salt and pepper.
- Wrap in foil and roast on a baking sheet at 400ºF (204ºC) for 40 minutes.
- Let cool, then remove cloves from their skins and set aside.
Step 2: Prepare the Dough
- Sprinkle the yeast over the water and let it sit for 10-15 minutes.
- In a large bowl, stir together flour, oregano, salt, and rosemary. Set aside.
- Add yeast mixture, roasted garlic, and olive oil to the bowl.
- Use a rubber spatula to mix until combined; dough will be sticky with some flour around the edges.
Step 3: First Rise
- Cover the bowl with plastic wrap or a damp cloth.
- Let it rise somewhere warm until doubled in size—about 8-10 hours.
Step 4: Shape and Cold Proof
- Once risen, turn dough onto a floured surface.
- With floured hands, gently fold dough into itself several times until you form a ball.
- Place seam side up into a lightly floured bowl. Dust with flour, cover, and refrigerate overnight (or up to 48 hours).
Step 5: Preheat Oven
- When ready to bake, preheat oven to 450ºF (232ºC) with your Dutch oven inside.
Step 6: Shape Loaf
- Uncover the dough; invert onto lightly floured surface seam side down.
- Gently shape into a loaf; place on parchment paper.
- Score top with a razor blade or sharp knife.
Step 7: Bake Bread
- Remove Dutch oven from oven; transfer dough (on parchment) into it.
- Cover and bake for 30 minutes; then remove cover and bake for an additional 15 minutes until browned.
Step 8: Cool Before Slicing
Using parchment edges, lift bread from Dutch oven onto wire cooling rack to cool for up to an hour before slicing.
Enjoy your homemade Rosemary and Roasted Garlic Artisan Bread, perfect as a side dish or as part of a delicious meal!
How to Serve Rosemary and Roasted Garlic Artisan Bread
Serving Rosemary and Roasted Garlic Artisan Bread can enhance any meal. Its fragrant aroma and chewy texture make it a delightful addition to various dishes. Here are some serving suggestions to elevate your dining experience.
With Olive Oil and Balsamic Vinegar
- Drizzle high-quality extra-virgin olive oil and balsamic vinegar on a plate for dipping. This simple combination enhances the bread’s flavor profile.
As a Side for Soups
- Enjoy this artisan bread alongside hearty soups like minestrone or tomato basil. The crusty exterior is perfect for soaking up delicious broths.
With Cheese Platters
- Pair the bread with an assortment of cheeses, such as sharp cheddar or creamy goat cheese. The flavors of garlic and rosemary complement the richness of the cheeses.
Toasted with Toppings
- Slice and toast the bread, then top it with your favorite spreads, such as hummus, avocado, or even a classic bruschetta mix for a tasty appetizer.
In Sandwiches
- Use slices of the artisan bread to create gourmet sandwiches filled with fresh veggies, lean meats (like turkey), or roasted vegetables.
How to Perfect Rosemary and Roasted Garlic Artisan Bread
To achieve the best results with your Rosemary and Roasted Garlic Artisan Bread, consider these helpful tips.
-
Measure ingredients accurately: Precise measurements ensure consistent results and optimal texture in your bread.
-
Mind the rising time: Allow sufficient rising time for the dough. A longer rise develops more flavor; up to 48 hours in the fridge is ideal.
-
Use room temperature water: Water around 70°F (21°C) activates yeast effectively. Too hot or too cold can hinder fermentation.
-
Score the dough properly: Scoring allows steam to escape during baking, preventing unwanted bursting while giving your loaf a beautiful appearance.
-
Preheat your Dutch oven: Ensure your Dutch oven is fully heated before adding the dough. This helps achieve a perfect crust.
Best Side Dishes for Rosemary and Roasted Garlic Artisan Bread
Rosemary and Roasted Garlic Artisan Bread pairs wonderfully with many side dishes. These options enhance its flavor while providing variety to your meal.
-
Mixed Green Salad: A light salad with vinaigrette balances the savory flavors of the bread. Consider adding nuts or fruits for extra texture.
-
Grilled Vegetables: Charred seasonal vegetables complement the herbal notes in the bread while adding color to your plate.
-
Creamy Risotto: The richness of risotto makes an excellent backdrop for this artisan bread, perfect for mopping up creamy sauces.
-
Roasted Potatoes: Crispy roasted potatoes seasoned with herbs echo the flavors in your bread and offer a satisfying crunch.
-
Stuffed Peppers: Colorful stuffed peppers filled with grains or quinoa provide a nutritious counterpoint to the rich garlic notes in the bread.
-
Olive Tapenade: A spread made from olives adds a salty bite that pairs beautifully with both garlic and rosemary flavors in your artisan loaf.
Common Mistakes to Avoid
Making Rosemary and Roasted Garlic Artisan Bread can be simple, but some common pitfalls can affect your results.
- Using too much flour – Adding excess flour can make the bread dense. Use just enough to keep the dough from sticking.
- Not allowing enough rise time – Skipping the rise time can result in flat bread. Be patient and let it double in size.
- Skipping the cold proofing step – Cold proofing enhances flavor and texture. Don’t rush this step; refrigerate overnight for best results.
- Overbaking the bread – Baking too long can lead to a dry loaf. Keep an eye on it, and tap the crust to check if it sounds hollow.
- Ignoring oven temperature – An oven that’s not preheated properly can affect baking. Ensure your oven reaches 450ºF (232ºC) before baking.
Storage & Reheating Instructions
Refrigerator Storage
- item Store leftover bread in an airtight container or wrapped in plastic wrap.
- item It will stay fresh for up to 3 days in the refrigerator.
Freezing Rosemary and Roasted Garlic Artisan Bread
- item Wrap the bread tightly in plastic wrap or aluminum foil.
- item Place it in a freezer-safe bag or container for up to 3 months.
Reheating Rosemary and Roasted Garlic Artisan Bread
- Oven – Preheat to 350ºF (175ºC), place the bread directly on the rack, and heat for about 10-15 minutes.
- Microwave – Wrap in a damp paper towel and heat for 15-20 seconds; be cautious not to overdo it as it may become tough.
- Stovetop – Use a skillet over low heat, cover with a lid, and warm each side for about 2-3 minutes.
Frequently Asked Questions
Here are some common questions about making Rosemary and Roasted Garlic Artisan Bread that might help you achieve the best results.
What is the best way to store Rosemary and Roasted Garlic Artisan Bread?
Store it wrapped tightly in plastic wrap or an airtight container at room temperature for up to 3 days. For longer storage, freeze it.
Can I use fresh rosemary instead of dried?
Yes! Fresh rosemary works wonderfully. Use about three times more fresh than dried since it’s less concentrated in flavor.
How do I know when my bread is done?
Your bread is ready when it’s golden brown on top and sounds hollow when tapped. An internal temperature of around 200ºF (93ºC) also indicates doneness.
What makes this artisan bread unique?
The combination of roasted garlic and rosemary provides a robust flavor that sets this Rosemary and Roasted Garlic Artisan Bread apart from standard loaves.
Can I customize this recipe?
Absolutely! Feel free to add other herbs, cheeses, or even sun-dried tomatoes for a twist on this classic recipe.
Final Thoughts
Rosemary and Roasted Garlic Artisan Bread is not only delicious but also versatile enough for any meal. Its fragrant aroma fills your kitchen, making it perfect for gatherings or a cozy night at home. Try customizing with different herbs or spices to make it your own!
Rosemary and Roasted Garlic Artisan Bread

Indulge in the delightful flavors of Rosemary and Roasted Garlic Artisan Bread, a no-knead masterpiece that’s both easy to make and incredibly satisfying. This crusty loaf features the aromatic essence of roasted garlic paired beautifully with fresh rosemary, creating an inviting aroma that will fill your kitchen. Perfect for family dinners, gatherings, or simply enjoying on a cozy evening, this artisan bread is versatile enough to accompany soups, salads, or stand alone as a delicious snack. With its simple preparation process and impressive presentation, you’ll love sharing this homemade treat with friends and family.
- Prep Time: 20 minutes
- Cook Time: 45 minutes
- Total Time: 1 hour 5 minutes
- Yield: Approximately 12 servings 1x
- Category: Bread
- Method: Baking
- Cuisine: American
Ingredients
- 1 head garlic
- Extra-virgin olive oil
- 1½ cups water (room temperature)
- 1 teaspoon active dry yeast
- 3 cups bread flour
- ½ teaspoon dried oregano
- 1 teaspoon kosher salt
- 2 teaspoons finely chopped rosemary
- 1 whole head roasted garlic (smashed)
Instructions
- Roast the garlic by halving the head, drizzling it with olive oil, seasoning with salt and pepper, wrapping in foil, and baking at 400°F (204°C) for 40 minutes. Let cool and set aside.
- In a bowl, sprinkle yeast over water and let sit for 10-15 minutes. In another bowl, combine flour, oregano, salt, and rosemary. Add the yeast mixture and smashed roasted garlic to the dry ingredients along with olive oil. Mix until combined; the dough will be sticky.
- Cover the bowl with plastic wrap or a damp cloth and let it rise in a warm spot for about 8-10 hours until doubled in size.
- Turn out the dough onto a floured surface and shape into a ball. Place seam side up into a floured bowl, cover it lightly with flour, and refrigerate overnight (up to 48 hours).
- Preheat your oven to 450°F (232°C) with a Dutch oven inside.
- Shape the loaf on parchment paper, score the top, then transfer it into the hot Dutch oven. Cover and bake for 30 minutes; remove the lid and bake for another 15 minutes until golden brown.
- Cool on a wire rack before slicing.
Nutrition
- Serving Size: 1 slice (70g)
- Calories: 175
- Sugar: 0g
- Sodium: 250mg
- Fat: 2g
- Saturated Fat: 0g
- Unsaturated Fat: 2g
- Trans Fat: 0g
- Carbohydrates: 36g
- Fiber: 1g
- Protein: 6g
- Cholesterol: 0mg